I use/love Google Chrome as my browser, but I've noticed one thing I really don't like about it lately.
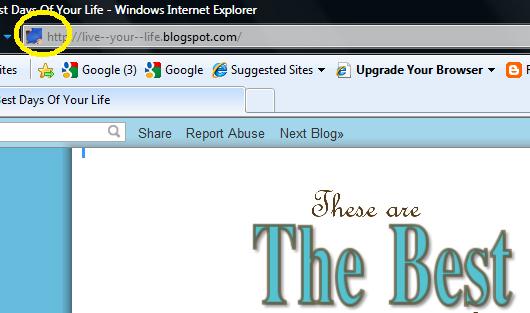
Favicons. The little images that show up right before the web address on some websites. This blog does not (yet) have one, but I made one for my Crafting blog when I redesigned it a few days ago, and I'm a big fan. Well, mine doesn't show up on Google Chrome. Favicons for other people's blogs do. But this is what my crafting blog favicon looks like in Internet Explorer:
They just personalize the blog just a little bit more and they can be so cute.
If you want to make your own favicon for your blog, it's super easy.
Here's a photo of my belly:
It's a horrible choice for a favicon, but I'm too lazy to find something better right now.
This photo has already been cropped for other reasons, but I need it to be square anyway. So use whatever photo editing program you have to make sure it's cropped square. Resize the photo as necessary because it can't be more than 100kb.
In blogger, go to your design, and the favicon option is right there at the top.
Find and upload your photo. Blogger will immediately let you know if the photo is too big or if it isn't perfectly square. If it works, it will show you your little favicon:
Save. And there it is. Your favicon.
Just choose a better photo than I did for my example. Something that's still recognizable when it's incredibly tiny.
Good luck!
Showing posts with label Tutorial. Show all posts
Tuesday, October 25, 2011
Wednesday, July 13, 2011
Tutorial: DIY Photobooth Props
With my photo obsession it's probably not a surprise that I decided to set up a little DIY photobooth at my baby shower. After looking around a little, I decided to make some fun props for people to play around with when they take their photos at the photobooth.
Materials Used:
- Adhesive felt - I got one red and one black ($1.69 CDN per sheet at Michael's)
- Cardstock to print the props onto. Regular paper would be way too flimsy
- Kabob sticks (or the random sticks I found in the craft aisle at Wal-Mart)
- Glue gun (or another strong adhesive for attaching the stick to the prop)
- Print props onto cardstock and cut those babies out. I doubled my cardstock for a couple of props by gluing another piece of prop-shaped cardstock to it. Not necessary, but useful if you want the prop to be a little stronger.
* I apologize for the horrible photos. I made the props at work at the only camera I had access to was a cell phone.
- Cut out your prop in the felt. Cutting adhesive felt is NOT fun. I found it easier to do a quick, messy job, then clean it up a bit afterwards.
- You can write on your prop with permanent marker to fill in little details (see bow tie below)
- Glue stick to your prop.
- Enjoy your props and take tons of fun photos. Bonus: if you blog about your props and photos and show me the link. Here are some of mine in action:
Hand made picture frame with Mod Podge
Decorative letters with Mod Podge
For more things handmade visit VB Creations Blog
More fun projects:
Hand painted Super Mario StarHand made picture frame with Mod Podge
Decorative letters with Mod Podge
For more things handmade visit VB Creations Blog
Sunday, April 10, 2011
Scrapbooking Sunday
Pregnancy: 1 Month, two pages
Supplies:
4 - 8.5 x 11 pages
(2 Yellow + 2 Green - Recollections paper from Michaels)
3 - 12 x 12 pages
(2 White + 1 Black)
(From the dollar store)
Miscellaneous stickers
(Mine from Michaels)
Tip: One of the most helpful things I can tell you is to never glue your entire page in place until you've seen it layed out and what it will look like finished. You can glue papers together, but never stick stickers or glue in pictures. Paper is easier replaced if you don't like what you were working on.
1. To start, take your green 8.5 x 11 pages, and cut two 1-inch strips from the longer side of the page. Glue one to the left side of the page, and one to the bottom. The bottom strip will have to be trimmed. Cut two strips from the black paper and do the same. Glue the entire yellow-green-black page to the top right hand corner of your white 12 x 12 page
2. I'm going to mount my photos on the green paper, mounted again on the black paper. If you have the photos ready to go, cut out a green rectangle measured to fit your photo, then a black rectangle to fit the green one. There will be one photo of the 4 pregnancy tests I ended up taking, and one photo of me holding a couple of the tests.
3. I stuck all my stickers on black paper to make them pop out a little more since they were all random colors.
4. On page one, I listed the reactions of some friends and family when they found out I was pregnant. I measured a long strip of yellow and a long strip of green that were as wide as I needed to fit in the white space on the left side, cutting them apart after I wrote the info on them. Not visible in the photo, but all the yellow strips are mounted with adhesive foam dots, so they're lifted off the page a bit more than the green strips.
5. Page two is made basically the same way, except made opposite so the pictures will mesh well together when side-by-side in the book. On the right side of page two I listed the dates I took my pregnancy tests, when I told people, and first doctor's appointment. And pre-pregnancy weight at the very bottom.
In the center of the empty yellow space will be a few belly pictures once they get developed, so I wasn't sure of their size and how I was going to place them.
I have stickers to cover each month of the pregnancy, and I'm beginning month #4 now, so I hope to get month 2 and 3 templates done shortly. Better pictures next time around. This may or may not be a new feature.
If you've posted on scrapbooking in the past week or so, send me your link. I might feature some other posts on the subject if there are any.
For more scrapbooking fun, visit Memories By Christine, who has all kinds of scrapbooking info all the time.
Labels:
Scrapbooking tutorial,
Scrappin' Sunday,
Tutorial
Wednesday, February 9, 2011
Tutorial: Create a Photoshop Brush
I found out something amazing today. Some of you may have no use for this whatsoever, but we can pretend, right? This is how you create your own brush for Photoshop, which can also be used as a watermark on your photos like so:
This tutorial is for simply making text brushes.
Step 1
Create a new document that is 6 inches wide, and 2 inches high, (432 x 144 pixels). Make sure it's white.
Step 2
Click on text, and write in whatever you want with black as the font color.
Step 3
Decorate it a bit if you want. You can use any brush, or shape or anything you already have. You can also stick in any photo you've drawn yourself.
Step 4
Click the Marquee tool, and select your entire creation.
Step 5
With your image still selected, click the 'Edit' drop down menu and find 'Define Brush Preset' or 'Define Brush' or whatever sounds similar to that. I have Photoshop CS4.
This window should pop up:
Name your brush whatever you want, then click okay.
Step 6
Your brush is now finished! Now let's test it out. Click on 'File' then 'Open' and choose whatever photo of yours you'd like to test your brush on. You can leave the brush that you just made open in case you want to play around with it more, or you can close it.
When your photo is open, click on your brush tool, and scroll to the very bottom, where you should find your new brush.
Now, I've come to notice that my brushes are WAY too small in their original form. so you'll probably have to make it bigger. I haven't yet figured out how to make it larger automatically. Mine needs to be somewhere above 1000 px to be big enough, but play around with it to find out what works for you.
The one I used in the image below is size 1242 px. I find it looks better on photos that aren't squeezed down in size to fit nicely into my blog :p
Let me know if you try it, and how it works out for you.
Labels:
photoshop tutorial,
Tutorial
Wednesday, January 12, 2011
Tutorial: Putting Archives on Own Page
One thing I really appreciate when reading blogs is their design and appearance. Now I'm not saying you have to go all out with your blog, just that the cleaner, more organized your page is, the more time I'm likely to spend there.
I recently played around with my blog design and while I was working at it I tidied up my sidebars. One feature that is so convenient and almost mandatory in my eyes is the 'Archive' gadget. It's the quick, easy way to look back at older posts. To find an old post you once read and wanted to read again. I love the convenient way of the archives. I just didn't like it on my sidebar anymore. And so here is how you can get your archives on a stand-alone page.
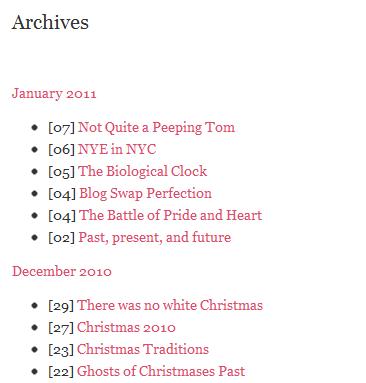
Here is what it will look like:

Step 1: Create the stand-alone page
- Go to your dashboard
- Click on the 'posting' tab
- Click on edit pages
- Then click on new page

Step 2: Put in the Info
- Name your new page 'Archives' or whatever you heart pleases
- Click on the 'Edit HTML' tab
- Insert the following code:
<script style="text/javascript" src="http://abu-farhan.com/script/daftarisibloggerarchive/tocbyarchivemin.js">
</script>
<script src="http://YOURBLOGURLHERE.blogspot.com/feeds/posts/default?max-results=500&alt=json-in-script&callback=loadtoc">
</script>
- Where you see 'YOURBLOGURLHERE', insert your blog name. Remove the '.blogspot' part as well, if needed*

- You can add whatever text you want before or after the code, if you'd like
Step 3: The End
- Click 'Publish Page' and you are basically done
- You will see the following options, and can choose if you want the page to appear in your sidebar, blog tabs, or choose 'No gadget' to link the pages manually, depending on your blog design **

* I've only tried it on my blogger-hosted website and do not know how it may work if you have your own domain and such. I am no expert.
** I made and linked my blog tabs myself, so I pick 'no gadget' and use the link the buttons myself
Hope this helps. If you decide to try it, let me know how it works out :)
Labels:
about blogging,
blogging tips,
helpful tips,
Tutorial
Subscribe to:
Posts (Atom)